
Download & Setup
Overview
Section titled “Overview”The ARCH.id.S suite operates on a simple philosophy: architectural add-ins should enhance your drafting workflow, not clutter your computer or slow down your design tools. Instead of managing dozens of disconnected .msi installers and scattered tool folders, our centralized setup handles your entire design toolkit from a unified interface.
Once you install the ARCH.id.S Platform Hub, you unlock instant, seamless access to our expanding lineup of essential modeling utilities alongside our high-performance premium suites—all without dealing with loose system files or confusing folder installations.
The Zero-Clutter Ribbon Architecture
Section titled “The Zero-Clutter Ribbon Architecture”In alignment with best design practices, our suite features a streamlined, zero-clutter Revit ribbon interface. Rather than taking up valuable screen space with separate dropdown buttons for running, updating, or resetting individual commands, every ARCH.id.S tool occupies a single, clear ribbon icon.
When you click a tool, its integrated dialog manages everything in one place—whether you are deploying brand new parametric layouts, modifying existing assemblies in an interactive update mode, or purging out-of-date BIM tracking data. Your Revit workspace stays clean, professional, and intuitive.
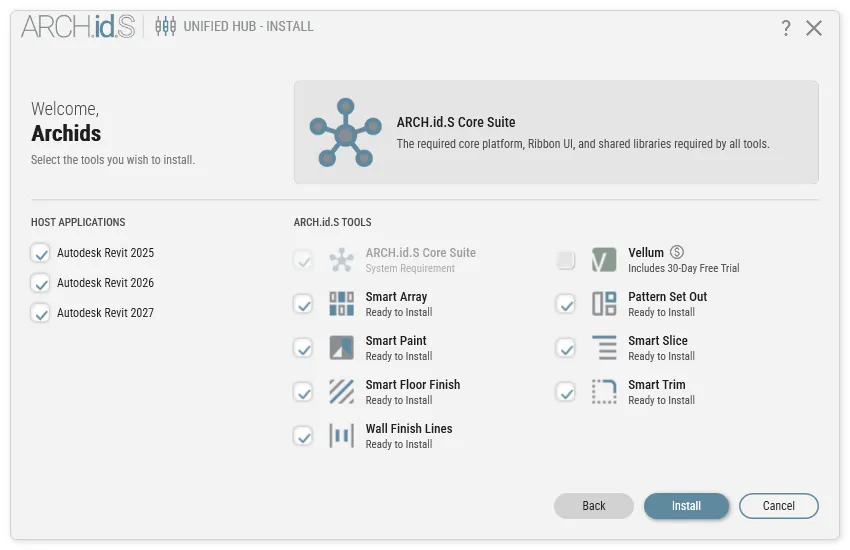
- Core Free Add-ins Suite: A rich, continually growing collection of essential drafting and modeling utilities—including tools like Smart Array, Wall Finish Lines, Finish Pattern Set-Out, Smart Floor Finish, and Smart Paint—designed to eliminate repetitive Revit tasks. New productivity utilities are regularly added to the free suite!
- Premium Overlays: High-performance generative design, visualization, and specialized engineering environments, starting with signature suites like Vellum and Mylar, with additional advanced overlays actively in development.
1. Download & Installation
Section titled “1. Download & Installation”Installing or updating your ARCH.id.S tools on your computer takes just a couple of minutes:
- Close Revit: Ensure all active sessions of Autodesk Revit are completely closed before running the setup installer.
- Access the Download Page: Navigate to the official Downloads Page on our portal.
- Download the Installer: Sign into your designer account and download the latest
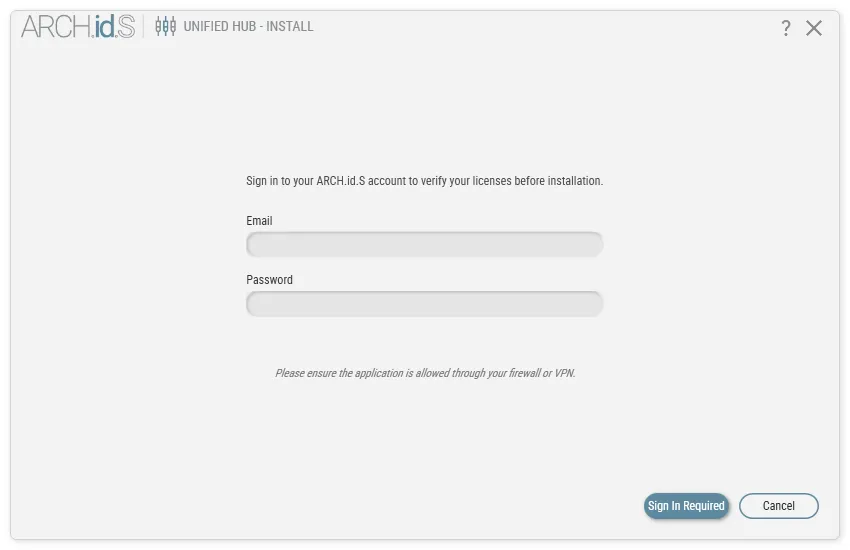
ARCHids_Unified_Hub_Installer.exeexecutable package. - Run the Setup: Double-click the installer and follow the simple Windows setup wizard. The installation engine will automatically scan your workstation for compatible Autodesk Revit releases (2025+) and safely deploy the appropriate add-in assemblies to your system.
- Launch & Authorize: When you open Revit, the brand new ARCH.id.S tab will appear directly in your ribbon menu! Open the desktop app or click the Account button on your Revit ribbon to sign in and activate your tools.
Installation Maintenance & Troubleshooting
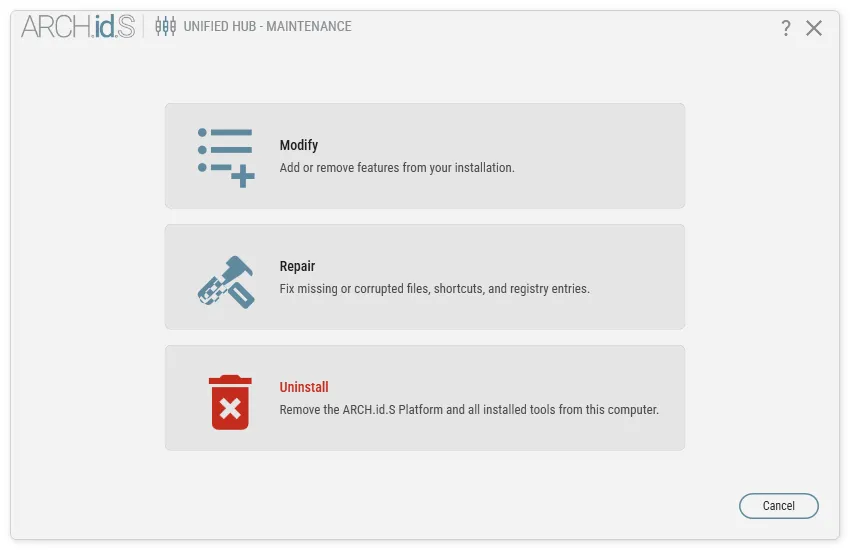
Section titled “Installation Maintenance & Troubleshooting”As your project roles evolve, you may wish to tailor which specific utilities appear on your Revit ribbon, or run a quick system integrity scan. You never need to track down legacy setup files to manage your installation.
Simply navigate to your standard Windows Settings > Apps > Installed Apps (or Programs and Features in traditional Windows layouts) and click on ARCH.id.S Platform Hub. Selecting Modify (or running the primary Hub setup executable again) opens our unified bootstrapper maintenance dialog:
- Modify: Custom-tailor your active workstation by toggling individual add-ins on or off, keeping your Revit ribbon trimmed exclusively to the tools you need for your active project deliverables.
- Repair: Performs an automated system integrity sweep, validating DLL alignments, registry binds, and background engine links to fix any corrupted files without resetting your custom tool tolerances.
- Uninstall: Safely and cleanly sweeps all application files, local caches, and Revit ribbon bindings from your computer in a single click.
2. Access Tiers & Activation
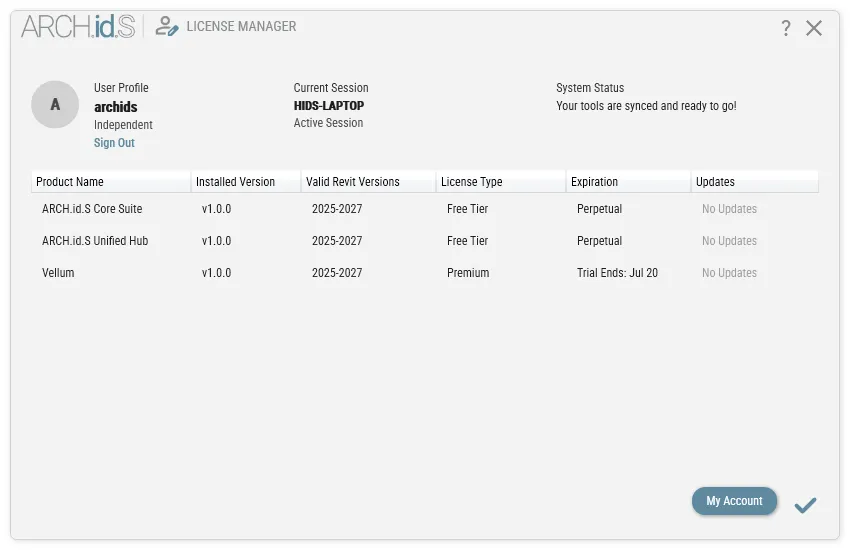
Section titled “2. Access Tiers & Activation”We believe software authorization should be invisible in your everyday drafting. To keep daily operations effortless, the desktop Platform Hub is utilized strictly to handle package downloads and installer verification. Once your plugins are installed, licensing and account validation operate cleanly inside Revit via our License Manager Dashboard powered by a silent background synchronization engine.
The Seamless Authentication Workflow
Section titled “The Seamless Authentication Workflow”- Silent Background Sync: When you boot Revit, our lightweight authentication engine initializes in the background. If you have signed in previously, it silently validates your local security tokens and verifies active tool entitlements without generating intrusive splash screens or interrupting your loading sequence.
- First-Time Login & Renewals: If you are launching on a new laptop or returning after an extended offline period, simply begin designing! You do not need to hunt down dashboard windows before starting your work.
- Gentle Verification Prompts: Should you attempt to invoke a premium workflow that requires user authentication, the tool will never lock your screen with disruptive error warnings. A compact, clean notification box will simply point you toward the Account icon on your ARCH.id.S ribbon tab to authenticate your credentials in seconds.
Once signed in through the Account button, your entire Core Free Tools lineup and any active Premium Overlay licenses are authenticated and ready for immediate deployment!
3. Seat & Workspace Management
Section titled “3. Seat & Workspace Management”For collaborative studios and architects moving between environments, our premium licensing utilizes flexible floating seat allocations. Switching between your primary studio workstation, a home desktop, and a mobile client-presentation laptop is seamless and automated.
Automated Seat Release
Section titled “Automated Seat Release”When you safely close Revit or log out of your profile inside the desktop Platform Hub, your active workstation seat unlocks instantly and returns to your firm’s available pool—ready for a teammate or your alternative computer to pick up right away.
Offline Design & Travel Grace Periods
Section titled “Offline Design & Travel Grace Periods”Whether you are performing offline structural site inspections, traveling on flights, or working through unexpected internet outages, your design timeline shouldn’t halt just because your connection drops:
- First-Time Setup: Your initial session initialization requires a brief online verification so the License Manager can securely register your local device fingerprint and establish your workspace tokens.
- Offline Grace Periods: Once authorized, you can disconnect from the internet completely! Both your free utilities and active premium suites continue operating uninterrupted under an automatic offline grace period—allowing you to draft, slice, paint, and document offline. The system will quietly resynchronize with our servers the next time your computer regains internet access.
Remote Workstation Release (Individual Users)
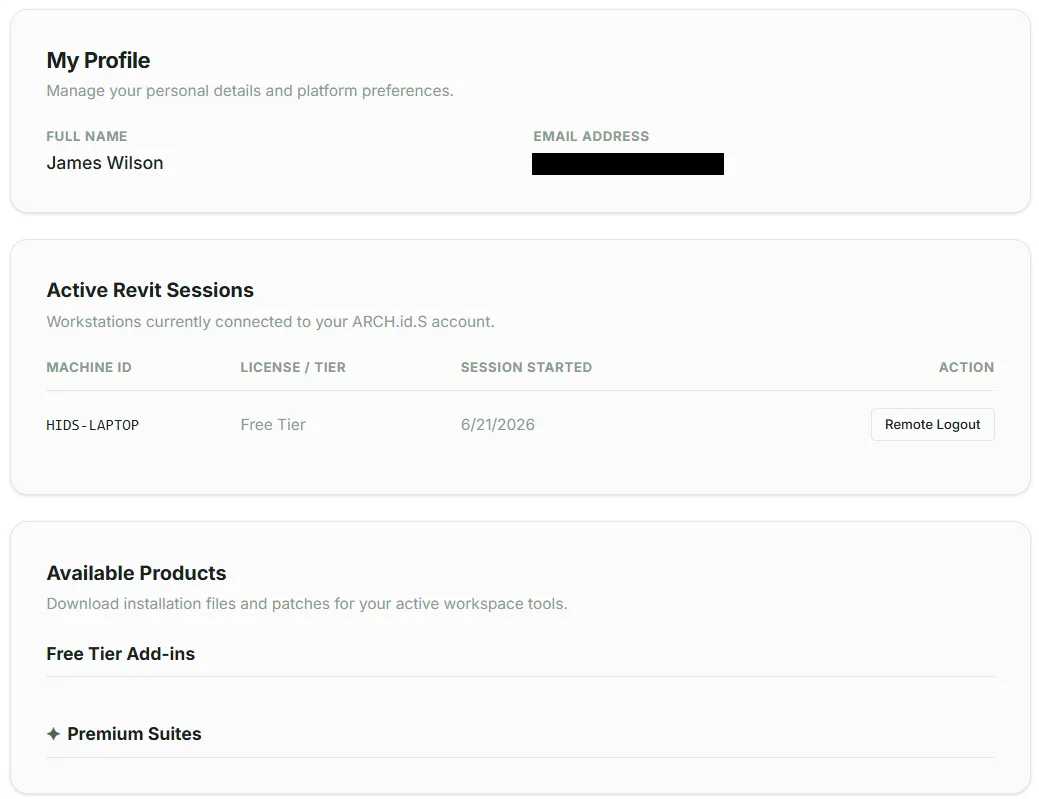
Section titled “Remote Workstation Release (Individual Users)”If you accidentally left a Revit session open on your office computer and need to finalize a drawing set from home, you can easily reclaim your active design seat via any web browser:
- Sign into your online Account Dashboard.
- Navigate to your Subscription Tier overview interface.
- Expand your real-time log of Currently Checked-In Workstations.
- Identify the idle office desktop and click Disconnect Workstation. The cloud engine safely releases your seat instantly so you can get right to work on your current machine!
The BIM Manager’s Console (Firm Administrators)
Section titled “The BIM Manager’s Console (Firm Administrators)”For architectural practices and enterprise engineering teams, effective software management requires comprehensive visibility over company asset utilization without tracking physical dongles or cumbersome network license servers.
Designated firm administrators and BIM Managers automatically unlock an enterprise BIM Manager Console within their online dashboard sidebar:
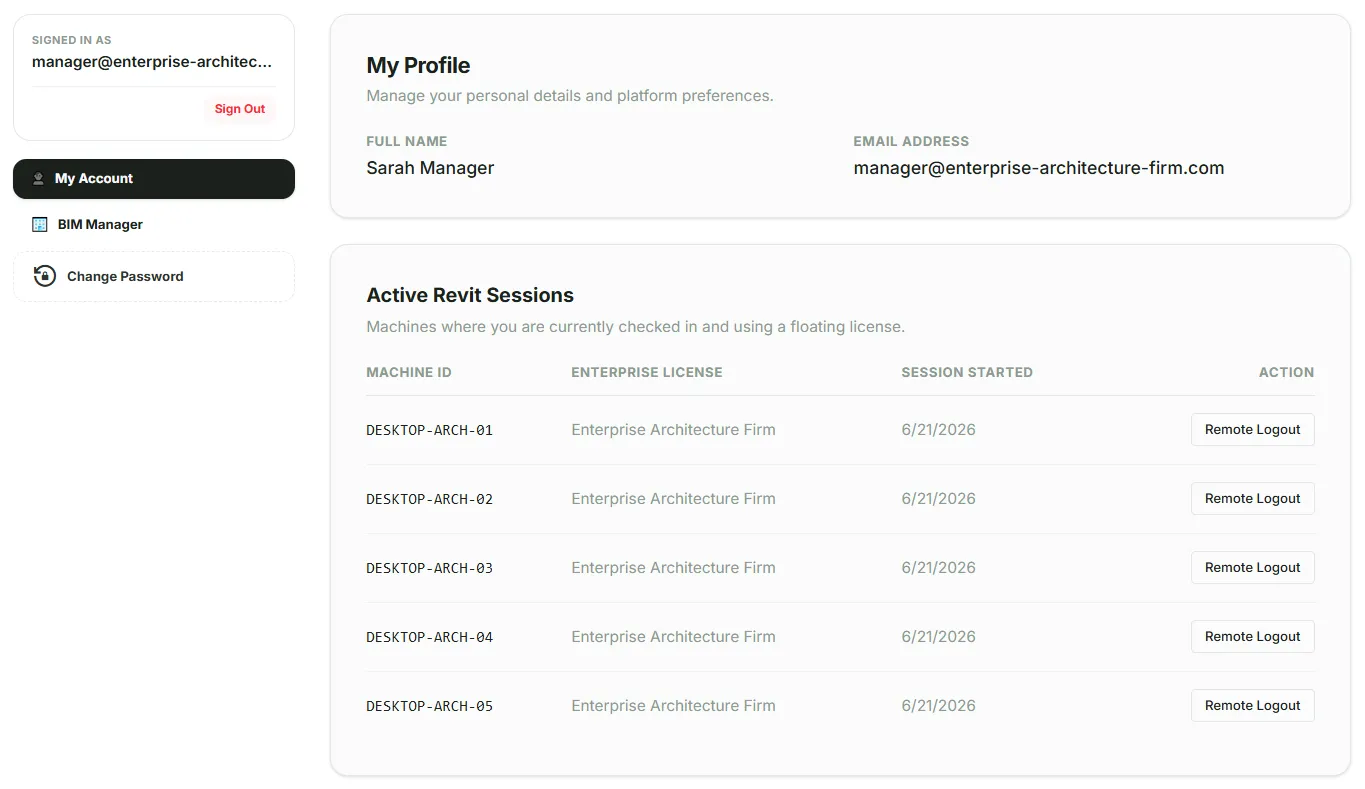
From this dedicated administrative hub, firm leadership can easily monitor and allocate license usage across multiple office branches:
- Enterprise Seat Utilization: Monitor your studio’s active capacity at a glance, viewing exactly how many floating licenses are actively checked out versus your total enterprise allowance (e.g., 12 / 25 seats active).
- Live Machine Registry: Review an itemized log of every active Revit session within your network. The registry details the user’s full name, corporate email address, machine ID, and exact session timestamp.
- Instant Seat Revocation: If a project computer is occupying a needed seat while an architect is away on leave, BIM Managers can click Revoke Seat directly from the registry console. This instantly clears the distant session token, liberating the seat immediately for another production draftsman to claim!